| 45.3. Easy configuration guide | ||
|---|---|---|
 | Chapter 45. VS - Video Surveillance |  |
| 45.3. Easy configuration guide | ||
|---|---|---|
| | Chapter 45. VS - Video Surveillance | |
This Chapter will be show how to easily configure cameras and alarms in VS driver and how to use the web interface.
![[Warning]](../images/warning.png) | Warning |
|---|---|
Only allowed users may access the web interface, check HTTP driver for details. |
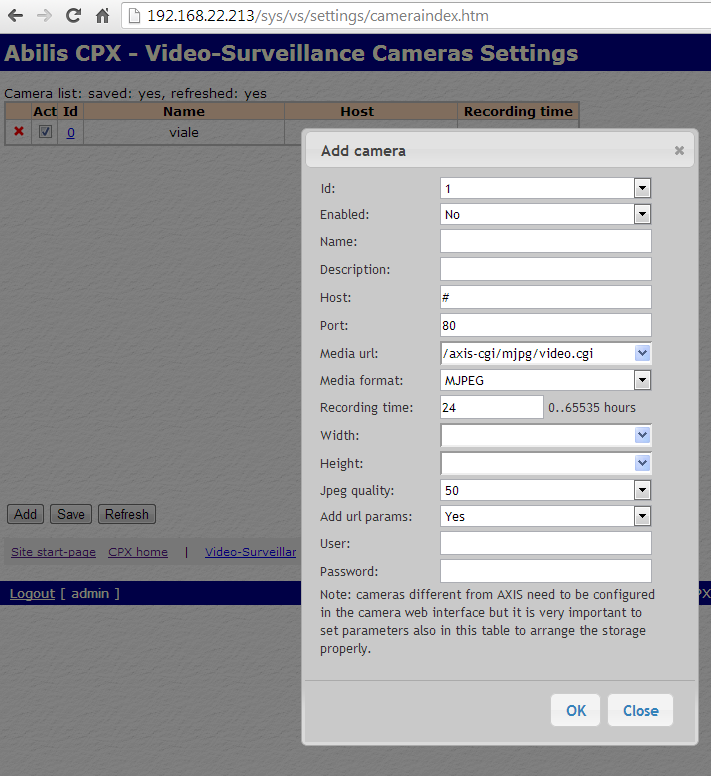
To add or edit a new camera it is possible to use the classic command interface of Abilis or to connect to http://<Abilis IP>/sys/vs/settings/cameraindex.htm for a web interface ( pressing the ADD button to add a new camera, or clicking on the id of an existing one to modify it).
The IP camera must have the MJPEG support.
The following informations are needed:
IP of FQDN of the camera
The TCP port of camera web server (normally 80)
Frame width and height, i.e:
320x240
640x480
704x480
704x576
720x576
768x576
800x600
1280x800
1280x1024
The JPEG quality (normally 50)
The Media URL, it is the subpath of the MJPEG video
The username and the password to access the camera web interface
If the camera is AXIS
Let's imagine the handle an AXIS camera, in such case the configuration could be (using the command interface of Abilis, but web interface may be used instead):
[16:12:52] ABILIS_CPX:a vs camera id:1 name:ufficio host:192.168.1.86COMMAND EXECUTED [16:12:52] ABILIS_CPX:s vs camera id:1 media-url:/axis-cgi/mjpg/video.cgiCOMMAND EXECUTED [16:12:52] ABILIS_CPX:s vs camera id:1 enabled:yes rec-time:24 ADD-URL-PARAMS:YESCOMMAND EXECUTED [16:12:52] ABILIS_CPX:s vs camera id:1 user:test pwd:secretCOMMAND EXECUTED [16:13:14] ABILIS_CPX:d vs camera- Not Saved (SAVE CONF), Not Refreshed (INIT) --------------------------------- ------------------------------------------------------------------------------- ID: |[DESCR:] ENABLED:|NAME: |USER: |PWD: |HOST: |PORT: |MEDIA-FORMAT: |WIDTH: |HEIGHT: |JPEG-Q: |MEDIA-URL: |ADD-URL-PARAMS: |REC-TIME: ------------------------------------------------------------------------------- 0 ufficio YES 192.168.001.086 test *** 80 MJPEG 640 480 50 /axis-cgi/mjpg/video.cgi YES 24 ------------------------------------------------------------------------------- [16:14:52] ABILIS_CPX:save confCOMMAND EXECUTED [16:15:52] ABILIS_CPX:init res:vsCOMMAND EXECUTED
Note that by default the camera uses the
"ADD-URL-PARAMS", this is an optimisation for AXIS
cameras and allow Abilis to automatically add parameters in the
media-url.
![[Caution]](../images/caution.png) | Caution |
|---|---|
Don't use |
Let's configure now a non-AXIS camera. In example a panasonic
camera. Note that in this case ADD-URL-PARAMS is set
to NO and eventually the parameters are manually
specified in the media URL and they should match with
WIDTH/HEIGHT parameters.
It is also possible to set the parameters in the web interface of the IP camera settings.
The media-URL depends on camera brand and model so access the web interface of the IP camera to understand which URL should be specified to access the video source.
[16:12:52] ABILIS_CPX:a vs camera id:1 name:viale host:192.168.1.111COMMAND EXECUTED [16:12:52] ABILIS_CPX:s vs camera id:1 /nphMotionJpeg?Resolution=640x480&Quality=StandardCOMMAND EXECUTED [16:12:52] ABILIS_CPX:s vs camera id:1 enabled:yes rec-time:24COMMAND EXECUTED [16:12:52] ABILIS_CPX:s vs camera id:1 user:admin pwd:secretCOMMAND EXECUTED [16:13:14] ABILIS_CPX:d vs camera- Not Saved (SAVE CONF), Not Refreshed (INIT) --------------------------------- ------------------------------------------------------------------------------- ID: |[DESCR:] ENABLED:|NAME: |USER: |PWD: |HOST: |PORT: |MEDIA-FORMAT: |WIDTH: |HEIGHT: |JPEG-Q: |MEDIA-URL: |ADD-URL-PARAMS: |REC-TIME: ------------------------------------------------------------------------------- 0 ufficio YES 192.168.001.086 test *** 80 MJPEG 640 480 50 /axis-cgi/mjpg/video.cgi YES 24 ------------------------------------------------------------------------------- 1 viale YES 192.168.001.111 admin *** 80 MJPEG 640 480 50 /nphMotionJpeg?Resolution=640x480&Quality=Standard NO 24 ------------------------------------------------------------------------------- [16:14:52] ABILIS_CPX:save confCOMMAND EXECUTED [16:15:52] ABILIS_CPX:init res:vsCOMMAND EXECUTED
To check if the camera is working show the diagnostics of the driver:
[16:39:56] ABILIS_CPX:d de vs

RES:Vs ------------------------------------------------------------------------
       Video_Surveillance
       STATE:ACTIVE              CUR-CAMERAS:1           CUR-ALARMS:2
       USED-SPACE:17 (Mib)       FREE-SPACE:983 (Mib)
       ALM-EVENTS:0              ALM-IMAGES:0            TOT-IMAGES:1353
       - VS Camera diagnostics ------------------------------------------------
       ID: State     RemAdd-RemPort         Used-Space  Free-Space
                     Alm-Events             Alm-Images  Tot-Images
       ------------------------------------------------------------------------
       0   ACTIVE    192.168.001.086-80     18          1
                     0                      0           1353
If the state of the camera is active the camera is correctly working, else be sure that the camera is reachable by the Abilis and check in the VS log via the command debug res:vs lsn:3.
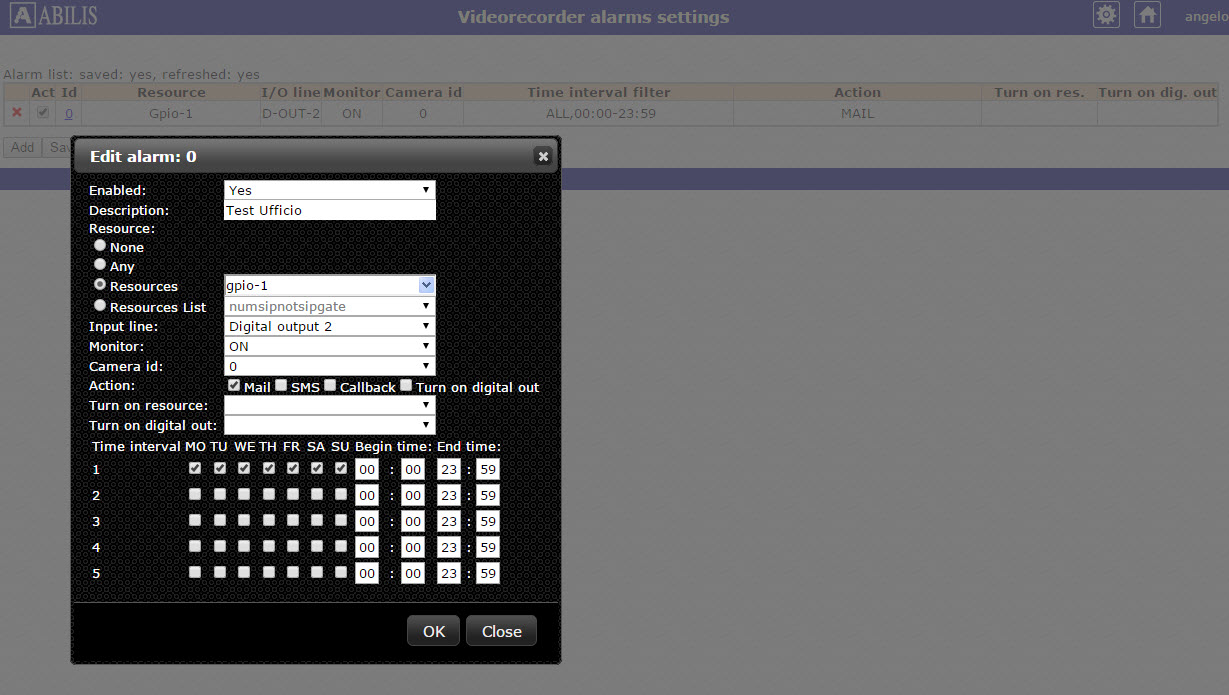
Let's use the web interface at http://<Abilis IP>/sys/vs/settings/alarmindex.htm
Note that is possible to specify a resource:
None
Any
Specific resource ( GPIO/MFIO)
Resource list
The interface automatically provides only available options. Refer to Abilis CPX manual to configure GPIO/MFIO resources.
Once the resource is set, it is possible to specify the analog/digital input/output/line.
The monitor parameter specify the event to be monitored (i.e. the trigger to ON of a digital input). The camera Id specifies the camera connected to such alarm.
Apart triggering the camera recording an alarm in VS driver may also:
Send a mail (SMTP driver must be properly configured) and
MAIL-FROM and MAIL-RCPT
parameters in vs port should specify the sender and the recipient of
the alarm mail.
Send a SMS to SMS-CDO number specified in VS driver
Perform a callback. using the DISA-* parameters in VS driver to match the related DISA service.
Turn on a digital output (i.e. turning on a light).
Finally a table allow to specify up to 5 timer intervals in which the alarm is enabled.
To check if the alarm trigger is working show the diagnostics of the driver:
[16:39:56] ABILIS_CPX:d de vs

RES:Vs ------------------------------------------------------------------------
       Video_Surveillance
       STATE:ACTIVE              CUR-CAMERAS:1           CUR-ALARMS:2
       USED-SPACE:17 (Mib)       FREE-SPACE:983 (Mib)
       ALM-EVENTS:0              ALM-IMAGES:0            TOT-IMAGES:1353
       - VS Camera diagnostics ------------------------------------------------
       ID: State     RemAdd-RemPort         Used-Space  Free-Space
                     Alm-Events             Alm-Images  Tot-Images
       ------------------------------------------------------------------------
       0   ACTIVE    192.168.001.086-80     18          1
                     0                      0           1353
Check ALM-EVENTS and ALM-IMAGES, their value should increase if a trigger occurred. The diagnostic is available for single camera too.
In case of trouble check if resource is properly working and then check the VS driver log (debug res:vs lsn:3).
| |  | |
| 45.2. VS tables |  | Part IV. CTI System |