| 56.9. The Chat | ||
|---|---|---|
 | Chapter 56. OPC panel - End user manual |  |
| 56.9. The Chat | ||
|---|---|---|
| | Chapter 56. OPC panel - End user manual | |
![]() Chat
button: In the OPC panel, click this button to open the chat.
Chat
button: In the OPC panel, click this button to open the chat.
Opened chats
Messages view
Contacts list
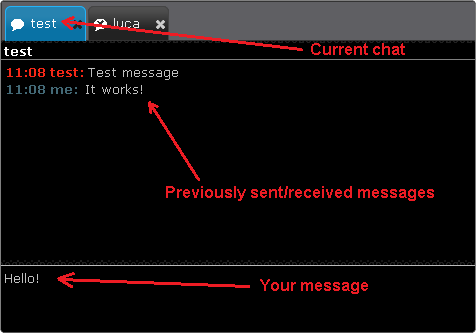
Click on the username from the contact list to open a chat.
For each open chat there is a corresponding tab. Click on the tabs to switch between two or more chats. A text input box at the bottom of the window allows you to write your message and send it pressing Enter. The received and sent messages are displayed on the screen.
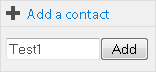
To add a contact to your contact list click on , write the contact's name and click .
If the contact's name corresponds to an existing user on the chat server, it will be immediatly put in the contact list. If it doesn't correspond to an existing user, it will be put in the pending contacts list and you can't send messages to it.
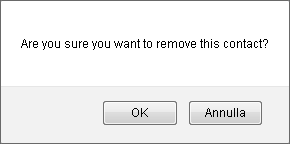
To remove a contact, put the mouse cursor on his name and click
on  .
.
A confirmation window appears. Click to remove the contact.
| |  | |
| 56.8. Audio conference |  | 56.10. View's settings |


 Online
user
Online
user Offline
user
Offline
user Busy user
 Away from
keyboard
Away from
keyboard
 , write your status
and click
, write your status
and click